
How to Schedule Products on Shopify
So you’ve built yourself a Shopify store. You’ve completed the first step to making your online business legit. But in our series of Shopify posts, I want to help you manage your Shopify website in the most efficient way possible so that you can make more online sales and keep your business selling!
You may not realise it, but it’s really easy to schedule products on Shopify. The benefits of scheduling products are endless, and depend what you’re looking to help do. For example, you might have hundreds of products going live at once, which is where the scheduler comes in handy. Other reasons might be so that you can schedule and forget about having to post them on the day of a launch. You can set your products up, perfect them, and schedule them all in one go! This allows you to have more time to work on your other marketing surrounding your new product launch!
In this blog posts we’ll take you through the process of scheduling products on shopify to go live at a later date or time, step by step.
1. Upload your product
The first step is to upload your product. Make sure you’ve added a title, blurb, images, variations (e.g. different sizes) and the price.
2. Select which channels you want your product to be made available on
From here, we want to select which channels our products will be available on. In this example, we only have ‘online store’ which means you website. Some other options that may be available to you might be Instagram and Facebook Shop.
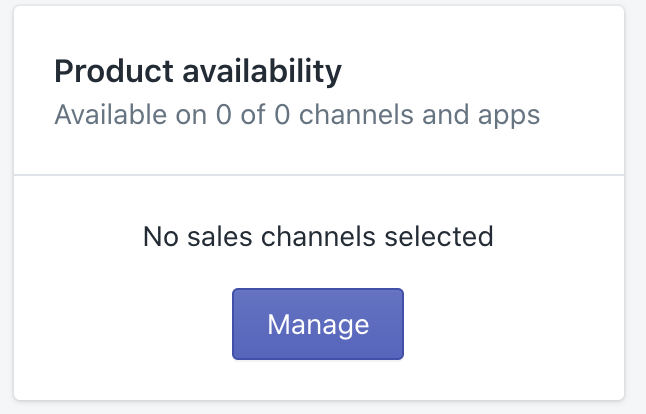
Click Manage > then select all the marketing channels you want the product to be available on (even if it’s not right now), including online shop, then select > done.

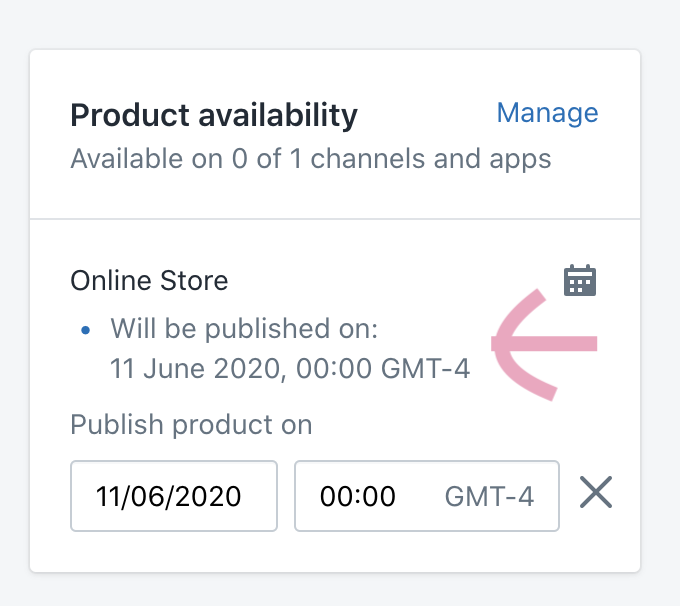
3. Schedule your product
You’ll notice next to the Online Store option under ‘product availability’, there’s a calendar icon. Click on this icon.

Next, a calendar will pop up. Use the calendar to select the date you’d like to schedule your product for. Then use the time selector to select the time you’d like it to post on your website.

4. Double check the date & save
Once you’ve selected the date and time, double check that it’s correct. Once you’ve done this you can save your product the way that you usually would. By clicking ‘save’ on the top right of the page!
And that’s it! Your product will be posted automatically for the time you have scheduled it. This means you can focus on your other marketing activity surrounding a product launch!